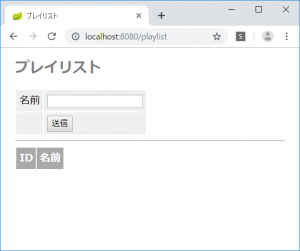
7月5日

プレイリストを登録できるようにする

リポジトリを作成する。

PlayListRepository.java

package jp.abc;

import org.springframework.data.jpa.repository.JpaRepository;

public interface PlayListRepository extends JpaRepository<PlayList, Long> {

}

コントローラが、GETとPOSTメソッドを受け取るように修正する。

package jp.abc;

import java.util.List;

import org.springframework.beans.factory.annotation.Autowired;
import org.springframework.stereotype.Controller;
import org.springframework.validation.Errors;
import org.springframework.validation.annotation.Validated;
import org.springframework.web.bind.annotation.ModelAttribute;
import org.springframework.web.bind.annotation.RequestMapping;
import org.springframework.web.bind.annotation.RequestMethod;
import org.springframework.web.servlet.ModelAndView;

@Controller
public class PlayListController {

	@Autowired
	private PlayListRepository repository;

	@RequestMapping(value = "/playlist", method = RequestMethod.GET)
	public ModelAndView list(ModelAndView mav) {
		mav.setViewName("playlist");
		PlayList pl = new PlayList();
		mav.addObject("formModel", pl);
		List<PlayList> list = repository.findAll();
		mav.addObject("datalist", list);
		return mav;
	}

	@RequestMapping(value = "playlist", method = RequestMethod.POST)
	public ModelAndView post(
			@ModelAttribute("formModel") @Validated PlayList playlist,
			Errors result,
			ModelAndView mav) {
		if (result.hasErrors()) {
			mav.addObject("msg", "エラーですよ");
			return mav;
		}
		repository.saveAndFlush(playlist);
		return new ModelAndView("redirect:/playlist");
	}
}

HTMLテンプレートを修正する。

<!DOCTYPE html>
<html xmlns:th="http://www.thymeleaf.org">
<head>
<meta charset="UTF-8">
<title>プレイリスト</title>
<style type="text/css">
h1 {
  font-size: 18pt;
  font-weight: bold;
  color: gray;
}
body {
  font-size: 13pt;
  color: gray;
  margin: 5px 25px;
}
pre {
  border: solid 3px #ddd;
  padding: 10px;
}
tr {
  margin: 5px;
}
th {
  padding: 5px;
  color: white;
  background: darkgray;
}
td {
  padding: 5px;
  color: black;
  background: #f0f0f0;
}
.err {
  color: red;
}
</style>
</head>
<body>

<h1>プレイリスト</h1>
<p th:text="${msg}"></p>
<form method="post" action="/playlist" th:object="${formModel}">
  <table>
    <tr>
      <td><label for="name">名前</label></td>
      <td>
        <input type="text" name="name" th:value="*{name}"
      			th:errorclass="err" />
      	<div th:if="${#fields.hasErrors('name')}" th:errors="*{name}"
      		th:errorclass="err"></div>
      </td>
    </tr>
    <tr>
      <td></td>
      <td><input type="submit" /></td>
    </tr>
  </table>
</form>

<hr />
<table>
  <tr>
    <th>ID</th><th>名前</th>
  </tr>
  <tr th:each="obj : ${datalist}">
    <td th:text="${obj.id}"></td>
    <td th:text="${obj.name}"></td>
  </tr>
</table>

</body>
</html>

PlayListとMusicを連携する

MusicからPlayListへの関連性を追加する。

package jp.abc;

import javax.persistence.Column;
import javax.persistence.Entity;
import javax.persistence.GeneratedValue;
import javax.persistence.GenerationType;
import javax.persistence.Id;
import javax.persistence.ManyToOne;
import javax.validation.constraints.NotEmpty;
import javax.validation.constraints.NotNull;

@Entity
public class Music {
	@Id
	@GeneratedValue(strategy = GenerationType.AUTO)
	@Column
	@NotNull
	private long id;

	@Column(length = 200, nullable = false)
	@NotEmpty
	private String title;

	@Column(length = 200, nullable = false)
	@NotEmpty
	private String artist;

	@ManyToOne
	private PlayList playlist;

	public long getId() {
		return id;
	}

	public void setId(long id) {
		this.id = id;
	}

	public String getTitle() {
		return title;
	}

	public void setTitle(String title) {
		this.title = title;
	}

	public String getArtist() {
		return artist;
	}

	public void setArtist(String artist) {
		this.artist = artist;
	}

	@Override
	public String toString() {
		return "Music [title=" + title + ", artist=" + artist + "]";
	}

	public PlayList getPlaylist() {
		return playlist;
	}

	public void setPlaylist(PlayList playlist) {
		this.playlist = playlist;
	}

}

PlayListからMusicへの関連性を追加する。

package jp.abc;

import java.util.List;

import javax.persistence.Column;
import javax.persistence.Entity;
import javax.persistence.GeneratedValue;
import javax.persistence.GenerationType;
import javax.persistence.Id;
import javax.persistence.OneToMany;
import javax.validation.constraints.NotEmpty;
import javax.validation.constraints.NotNull;

@Entity
public class PlayList {
	@Id
	@GeneratedValue(strategy = GenerationType.AUTO)
	@Column
	@NotNull
	private long id;

	@Column(length = 200, nullable = false)
	@NotEmpty
	private String name;

	@OneToMany
	private List<Music> musics;

	public long getId() {
		return id;
	}

	public void setId(long id) {
		this.id = id;
	}

	public String getName() {
		return name;
	}

	public void setName(String name) {
		this.name = name;
	}

	public List<Music> getMusics() {
		return musics;
	}

	public void setMusics(List<Music> musics) {
		this.musics = musics;
	}


}

Music を登録するHTMLテンプレート index.html に、プレイリストを設定するフィールドを追加する。

<!DOCTYPE html>
<html xmlns:th="http://www.thymeleaf.org">
<head>
<meta charset="UTF-8">
<title>ミュージックプレイヤー</title>
<style type="text/css">
h1 {
  font-size: 18pt;
  font-weight: bold;
  color: gray;
}
body {
  font-size: 13pt;
  color: gray;
  margin: 5px 25px;
}
pre {
  border: solid 3px #ddd;
  padding: 10px;
}
tr {
  margin: 5px;
}
th {
  padding: 5px;
  color: white;
  background: darkgray;
}
td {
  padding: 5px;
  color: black;
  background: #f0f0f0;
}
.err {
  color: red;
}
</style>
</head>
<body>

<h1>ミュージックプレイヤー</h1>
<p th:text="${msg}"></p>
<form method="post" action="/" th:object="${formModel}">
  <table>
    <tr>
      <td><label for="title">タイトル</label></td>
      <td>
        <input type="text" name="title" th:value="*{title}"
      			th:errorclass="err" />
      	<div th:if="${#fields.hasErrors('title')}" th:errors="*{title}"
      		th:errorclass="err"></div>
      </td>
    </tr>
    <tr>
      <td><label for="artist">アーティスト</label></td>
      <td>
        <input type="text" name="artist" th:value="*{artist}"
      			th:errorclass="err"/>
      	<div th:if="${#fields.hasErrors('artist')}" th:errors="*{artist}"
      		th:errorclass="err"></div>
      </td>
    </tr>
    <tr>
      <td><label for="playlist">プレイリスト</label></td>
      <td>
        <input type="text" name="playlist" th:value="*{playlist}"
      			th:errorclass="err"/>
      	<div th:if="${#fields.hasErrors('playlist')}" th:errors="*{playlist}"
      		th:errorclass="err"></div>
      </td>
    </tr>
    <tr>
      <td></td>
      <td><input type="submit" /></td>
    </tr>
  </table>
</form>

<hr />
<table>
  <tr>
    <th>ID</th><th>タイトル</th><th>アーティスト</th><th>編集</th><th>削除</th>
  </tr>
  <tr th:each="obj : ${datalist}">
    <td th:text="${obj.id}"></td>
    <td th:text="${obj.title}"></td>
    <td th:text="${obj.artist}"></td>
    <td><a th:href="@{'/edit/' + ${obj.id}}">編集</a></td>
    <td><a th:href="@{'/delete/' + ${obj.id}}">削除</a></td>
  </tr>
</table>

</body>
</html>

入力フォームの下に、Musicのリストを表示しているが、そこにプレイリスト名を表示する。
プレイリストがnullの場合は「プレイリストなし」と表示する。

<hr />
<table>
  <tr>
    <th>ID</th><th>タイトル</th><th>アーティスト</th><th>プレイリスト</th><th>編集</th><th>削除</th>
  </tr>
  <tr th:each="obj : ${datalist}">
    <td th:text="${obj.id}"></td>
    <td th:text="${obj.title}"></td>
    <td th:text="${obj.artist}"></td>
    <td th:if="${obj.playlist != null}" th:text="${obj.playlist.name}"></td>
    <td th:if="${obj.playlist == null}" th:text="プレイリストなし"></td>
    <td><a th:href="@{'/edit/' + ${obj.id}}">編集</a></td>
    <td><a th:href="@{'/delete/' + ${obj.id}}">削除</a></td>
  </tr>
</table>

Musicを編集できるようにする。

コントローラで編集のURLを受け付けるようにする。

	@RequestMapping(value = "/edit/{id}")
	public ModelAndView edit(@ModelAttribute Music music,
			@PathVariable long id,
			ModelAndView mav) {
		mav.setViewName("edit");
		mav.addObject("title", "edit music");
		Optional<Music> data = repository.findById(id);
		mav.addObject("formModel", data.get());
		return mav;
	}

HTMLテンプレート edit.html を作成する。

<!DOCTYPE html>
<html xmlns:th="http://www.thymeleaf.org">
<head>
<meta charset="UTF-8">
<title>top page</title>
<meta http-equiv="Content-type" content="text/html; charset=UTF-8" />
<style type="text/css">
h1 {
  font-size: 18pt;
  font-weight: bold;
  color: gray;
}
body {
  font-size: 13pt;
  color: gray;
  margin: 5px 25px;
}
pre {
  border: solid 3px #ddd;
  padding: 10px;
}
tr {
  margin: 5px;
}
th {
  padding: 5px;
  color: white;
  background: darkgray;
}
td {
  padding: 5px;
  color: black;
  background: #f0f0f0;
}
</style>
</head>
<body>

<h1>Music edit page</h1>

<form method="post" action="/edit" th:object="${formModel}">
  <input type="hidden" name="id" th:value="*{id}" />
  <table>
    <tr>
      <td><label for="title">タイトル</label></td>
      <td><input type="text" name="title" th:value="*{title}" /></td>
    </tr>
    <tr>
      <td><label for="artist">アーティスト</label></td>
      <td><input type="text" name="artist" th:value="*{artist}" /></td>
    </tr>
    <tr>
      <td><label for="playlist">プレイリスト</label></td>
      <td th:if="*{playlist != null}">
        <input type="text" name="playlist" th:value="*{playlist.id}" />
      </td>
      <td th:if="*{playlist == null}">
        <input type="text" name="playlist" value="" />
      </td>
    </tr>
    <tr>
      <td></td>
      <td><input type="submit" /></td>
    </tr>
  </table>
</form>


</body>
</html>

MusicController で POSTを受け付ける。

	@RequestMapping(value = "/edit", method = RequestMethod.POST)
	public ModelAndView form(@ModelAttribute @Validated Music music,
			Errors result,
			ModelAndView mav) {
		if (result.hasErrors()) {
			return mav;
		}
		repository.saveAndFlush(music);
		return new ModelAndView("redirect:/");
	}

7月2日

ミュージックプレイヤーのWebアプリケーションを作ってみる

以前、JavaコンソールアプリケーションとしてMusicPlayerを作成したが、今回は、それをSpringBootを使用したWebアプリケーションとして作成してみる。

まずは新規プロジェクトを作成する。

プロジェクト名は好きなように決めてよい。

pom.xml で SpringBoot のバージョンを変更する。
デフォルトでは2.1.6になっているが、エラーが発生するので、これまでに使っていた2.1.4にする。
そして、ThymeleafとJPAとHSQLDBの依存関係も追加しておく。

<?xml version="1.0" encoding="UTF-8"?>
<project xmlns="http://maven.apache.org/POM/4.0.0" xmlns:xsi="http://www.w3.org/2001/XMLSchema-instance"
	xsi:schemaLocation="http://maven.apache.org/POM/4.0.0 http://maven.apache.org/xsd/maven-4.0.0.xsd">
	<modelVersion>4.0.0</modelVersion>
	<parent>
		<groupId>org.springframework.boot</groupId>
		<artifactId>spring-boot-starter-parent</artifactId>
		<version>2.1.4.RELEASE</version>
		<relativePath/> <!-- lookup parent from repository -->
	</parent>
	<groupId>jp.abc</groupId>
	<artifactId>stunes</artifactId>
	<version>0.0.1-SNAPSHOT</version>
	<name>stunes</name>
	<description>Demo project for Spring Boot</description>

	<properties>
		<java.version>1.8</java.version>
	</properties>

	<dependencies>
		<dependency>
			<groupId>org.springframework.boot</groupId>
			<artifactId>spring-boot-starter-web</artifactId>
		</dependency>

		<dependency>
			<groupId>org.springframework.boot</groupId>
			<artifactId>spring-boot-starter-test</artifactId>
			<scope>test</scope>
		</dependency>

		<dependency>
			<groupId>org.springframework.boot</groupId>
			<artifactId>spring-boot-starter-thymeleaf</artifactId>
		</dependency>

		<dependency>
			<groupId>org.springframework.boot</groupId>
			<artifactId>spring-boot-starter-data-jpa</artifactId>
		</dependency>

		<dependency>
			<groupId>org.hsqldb</groupId>
			<artifactId>hsqldb</artifactId>
		</dependency>
	</dependencies>

	<build>
		<plugins>
			<plugin>
				<groupId>org.springframework.boot</groupId>
				<artifactId>spring-boot-maven-plugin</artifactId>
			</plugin>
		</plugins>
	</build>

</project>

HSQLDBを起動するBATファイルに、新しいデータベースインスタンスを追加する。

cd C:\pleiades\hsqldb-2.4.1\hsqldb\lib
java -cp hsqldb.jar org.hsqldb.Server --database.0 db/mydata --dbname.0 mydata --database.1 db/stunes --dbname.1 stunes

Musicエンティティを作成する。

package jp.abc;

import javax.persistence.Column;
import javax.persistence.Entity;
import javax.persistence.GeneratedValue;
import javax.persistence.GenerationType;
import javax.persistence.Id;
import javax.validation.constraints.NotEmpty;
import javax.validation.constraints.NotNull;

@Entity
public class Music {
	@Id
	@GeneratedValue(strategy = GenerationType.AUTO)
	@Column
	@NotNull
	private long id;

	@Column(length = 200, nullable = false)
	@NotEmpty
	private String title;

	@Column(length = 200, nullable = false)
	@NotEmpty
	private String artist;

	public long getId() {
		return id;
	}

	public void setId(long id) {
		this.id = id;
	}

	public String getTitle() {
		return title;
	}

	public void setTitle(String title) {
		this.title = title;
	}

	public String getArtist() {
		return artist;
	}

	public void setArtist(String artist) {
		this.artist = artist;
	}

	@Override
	public String toString() {
		return "Music [title=" + title + ", artist=" + artist + "]";
	}

}

リポジトリを作成する。

package jp.abc;

import org.springframework.data.jpa.repository.JpaRepository;

public interface MusicRepository extends JpaRepository<Music, Long> {

}

コントローラを作成する。

package jp.abc;

import org.springframework.beans.factory.annotation.Autowired;
import org.springframework.stereotype.Controller;
import org.springframework.web.bind.annotation.RequestMapping;
import org.springframework.web.servlet.ModelAndView;

@Controller
public class MusicController {

	@Autowired
	private MusicRepository repository;

	@RequestMapping("/")
	public ModelAndView index(ModelAndView mav) {
		mav.setViewName("index");
		return mav;
	}
}

HTMLテンプレートを作成する。
CSSと入力フォームの部分は、mydata.html の該当箇所をコピーして使うと早い。

<!DOCTYPE html>
<html xmlns:th="http://www.thymeleaf.org">
<head>
<meta charset="UTF-8">
<title>ミュージックプレイヤー</title>
<style type="text/css">
h1 {
  font-size: 18pt;
  font-weight: bold;
  color: gray;
}
body {
  font-size: 13pt;
  color: gray;
  margin: 5px 25px;
}
pre {
  border: solid 3px #ddd;
  padding: 10px;
}
tr {
  margin: 5px;
}
th {
  padding: 5px;
  color: white;
  background: darkgray;
}
td {
  padding: 5px;
  color: black;
  background: #f0f0f0;
}
.err {
  color: red;
}
</style>
</head>
<body>

<h1>ミュージックプレイヤー</h1>
<p th:text="${msg}"></p>
<form method="post" action="/" th:object="${formModel}">
  <table>
    <tr>
      <td><label for="title">タイトル</label></td>
      <td>
        <input type="text" name="title" th:value="*{title}"
      			th:errorclass="err" />
      	<div th:if="${#fields.hasErrors('title')}" th:errors="*{title}"
      		th:errorclass="err"></div>
      </td>
    </tr>
    <tr>
      <td><label for="artist">アーティスト</label></td>
      <td>
        <input type="text" name="artist" th:value="*{artist}"
      			th:errorclass="err"/>
      	<div th:if="${#fields.hasErrors('artist')}" th:errors="*{artist}"
      		th:errorclass="err"></div>
      </td>
    </tr>
    <tr>
      <td></td>
      <td><input type="submit" /></td>
    </tr>
  </table>
</form>

</body>
</html>

これで実行するとエラーが発生する。
コントローラで formModel を渡していないのが原因なので、コントローラを修正する。

package jp.abc;

import org.springframework.beans.factory.annotation.Autowired;
import org.springframework.stereotype.Controller;
import org.springframework.web.bind.annotation.RequestMapping;
import org.springframework.web.servlet.ModelAndView;

@Controller
public class MusicController {

	@Autowired
	private MusicRepository repository;

	@RequestMapping("/")
	public ModelAndView index(ModelAndView mav) {
		mav.setViewName("index");
		Music m = new Music();
		mav.addObject("formModel", m);
		return mav;
	}
}

POSTメソッドを受け付けるようにするために、コントローラを修正する。

package jp.abc;

import org.springframework.beans.factory.annotation.Autowired;
import org.springframework.stereotype.Controller;
import org.springframework.validation.Errors;
import org.springframework.validation.annotation.Validated;
import org.springframework.web.bind.annotation.ModelAttribute;
import org.springframework.web.bind.annotation.RequestMapping;
import org.springframework.web.bind.annotation.RequestMethod;
import org.springframework.web.servlet.ModelAndView;

@Controller
public class MusicController {

	@Autowired
	private MusicRepository repository;

	@RequestMapping(value = "/", method = RequestMethod.GET)
	public ModelAndView index(ModelAndView mav) {
		mav.setViewName("index");
		Music m = new Music();
		mav.addObject("formModel", m);
		return mav;
	}

	@RequestMapping(value = "/", method = RequestMethod.POST)
	public ModelAndView post(
			@ModelAttribute("formModel") @Validated Music music,
			Errors result,
			ModelAndView mav) {
		if (result.hasErrors()) {
			mav.setViewName("index");
			mav.addObject("msg", "エラーです");
			return mav;
		}
		repository.saveAndFlush(music);
		return new ModelAndView("redirect:/");
	}
}

データベース接続の設定を、application.properties ファイルに記述する。

spring.datasource.url=jdbc:hsqldb:hsql://localhost/stunes
spring.datasource.username=sa
spring.datasource.password=
spring.datasource.driver-class-name=org.hsqldb.jdbc.JDBCDriver
spring.jpa.properties.hibernate.dialect=org.hibernate.dialect.HSQLDialect
spring.jpa.hibernate.ddl-auto=update

HTMLテンプレートに、保存されているデータのリストを表示するテーブルを追加する。

<!DOCTYPE html>
<html xmlns:th="http://www.thymeleaf.org">
<head>
<meta charset="UTF-8">
<title>ミュージックプレイヤー</title>
<style type="text/css">
h1 {
  font-size: 18pt;
  font-weight: bold;
  color: gray;
}
body {
  font-size: 13pt;
  color: gray;
  margin: 5px 25px;
}
pre {
  border: solid 3px #ddd;
  padding: 10px;
}
tr {
  margin: 5px;
}
th {
  padding: 5px;
  color: white;
  background: darkgray;
}
td {
  padding: 5px;
  color: black;
  background: #f0f0f0;
}
.err {
  color: red;
}
</style>
</head>
<body>

<h1>ミュージックプレイヤー</h1>
<p th:text="${msg}"></p>
<form method="post" action="/" th:object="${formModel}">
  <table>
    <tr>
      <td><label for="title">タイトル</label></td>
      <td>
        <input type="text" name="title" th:value="*{title}"
      			th:errorclass="err" />
      	<div th:if="${#fields.hasErrors('title')}" th:errors="*{title}"
      		th:errorclass="err"></div>
      </td>
    </tr>
    <tr>
      <td><label for="artist">アーティスト</label></td>
      <td>
        <input type="text" name="artist" th:value="*{artist}"
      			th:errorclass="err"/>
      	<div th:if="${#fields.hasErrors('artist')}" th:errors="*{artist}"
      		th:errorclass="err"></div>
      </td>
    </tr>
    <tr>
      <td></td>
      <td><input type="submit" /></td>
    </tr>
  </table>
</form>

<hr />
<table>
  <tr>
    <th>ID</th><th>タイトル</th><th>アーティスト</th><th>編集</th><th>削除</th>
  </tr>
  <tr th:each="obj : ${datalist}">
    <td th:text="${obj.id}"></td>
    <td th:text="${obj.title}"></td>
    <td th:text="${obj.artist}"></td>
    <td><a th:href="@{'/edit/' + ${obj.id}}">編集</a></td>
    <td><a th:href="@{'/delete/' + ${obj.id}}">削除</a></td>
  </tr>
</table>

</body>
</html>

コントローラで、datalist の名前で、データをわたす。

	@RequestMapping(value = "/", method = RequestMethod.GET)
	public ModelAndView index(ModelAndView mav) {
		mav.setViewName("index");
		Music m = new Music();
		mav.addObject("formModel", m);
		List<Music> list = repository.findAll();
		mav.addObject("datalist", list);
		return mav;
	}

プレイリストも作ってみる

まずはエンティティを作成する。

package jp.abc;

import javax.persistence.Column;
import javax.persistence.Entity;
import javax.persistence.GeneratedValue;
import javax.persistence.GenerationType;
import javax.persistence.Id;
import javax.validation.constraints.NotEmpty;
import javax.validation.constraints.NotNull;

@Entity
public class PlayList {
	@Id
	@GeneratedValue(strategy = GenerationType.AUTO)
	@Column
	@NotNull
	private long id;

	@Column(length = 200, nullable = false)
	@NotEmpty
	private String name;

	public long getId() {
		return id;
	}

	public void setId(long id) {
		this.id = id;
	}

	public String getName() {
		return name;
	}

	public void setName(String name) {
		this.name = name;
	}


}

HTMLテンプレートを作成する。

<!DOCTYPE html>
<html xmlns:th="http://www.thymeleaf.org">
<head>
<meta charset="UTF-8">
<title>プレイリスト</title>
<style type="text/css">
h1 {
  font-size: 18pt;
  font-weight: bold;
  color: gray;
}
body {
  font-size: 13pt;
  color: gray;
  margin: 5px 25px;
}
pre {
  border: solid 3px #ddd;
  padding: 10px;
}
tr {
  margin: 5px;
}
th {
  padding: 5px;
  color: white;
  background: darkgray;
}
td {
  padding: 5px;
  color: black;
  background: #f0f0f0;
}
.err {
  color: red;
}
</style>
</head>
<body>

<h1>プレイリスト</h1>
<p th:text="${msg}"></p>
<form method="post" action="/" th:object="${formModel}">
  <table>
    <tr>
      <td><label for="name">名前</label></td>
      <td>
        <input type="text" name="name" th:value="*{name}"
      			th:errorclass="err" />
      	<div th:if="${#fields.hasErrors('name')}" th:errors="*{name}"
      		th:errorclass="err"></div>
      </td>
    </tr>
    <tr>
      <td></td>
      <td><input type="submit" /></td>
    </tr>
  </table>
</form>

<hr />
<table>
  <tr>
    <th>ID</th><th>名前</th>
  </tr>
  <tr th:each="obj : ${datalist}">
    <td th:text="${obj.id}"></td>
    <td th:text="${obj.title}"></td>
  </tr>
</table>

</body>
</html>

コントローラを作成する。

package jp.abc;

import org.springframework.stereotype.Controller;
import org.springframework.web.bind.annotation.RequestMapping;
import org.springframework.web.servlet.ModelAndView;

@Controller
public class PlayListController {
	@RequestMapping("/playlist")
	public ModelAndView list(ModelAndView mav) {
		mav.setViewName("playlist");
		PlayList pl = new PlayList();
		mav.addObject("formModel", pl);
		return mav;
	}
}

動いた!

6月28日

エンティティの連携

MyData に、複数の MsgData を関連付ける。

package jp.abc;

import javax.persistence.Column;
import javax.persistence.Entity;
import javax.persistence.GeneratedValue;
import javax.persistence.GenerationType;
import javax.persistence.Id;
import javax.persistence.ManyToOne;
import javax.validation.constraints.NotEmpty;
import javax.validation.constraints.NotNull;

@Entity
public class MsgData {
	
	@Id
	@GeneratedValue(strategy = GenerationType.AUTO)
	@Column
	@NotNull
	private Long id;
	
	@Column
	private String title;
	
	@Column
	@NotEmpty
	private String message;
	
	@ManyToOne
	private MyData mydata;

	public MsgData() {
		super();
		mydata = new MyData();
	}

	public Long getId() {
		return id;
	}

	public void setId(Long id) {
		this.id = id;
	}

	public String getTitle() {
		return title;
	}

	public void setTitle(String title) {
		this.title = title;
	}

	public String getMessage() {
		return message;
	}

	public void setMessage(String message) {
		this.message = message;
	}

	public MyData getMydata() {
		return mydata;
	}

	public void setMydata(MyData mydata) {
		this.mydata = mydata;
	}
	
}

MyData にもエンティティの連携に関連するコードを追加する。

package jp.abc;

import java.util.List;

import javax.persistence.Column;
import javax.persistence.Entity;
import javax.persistence.GeneratedValue;
import javax.persistence.GenerationType;
import javax.persistence.Id;
import javax.validation.constraints.Email;
import javax.validation.constraints.Max;
import javax.validation.constraints.Min;
import javax.validation.constraints.NotEmpty;
import javax.validation.constraints.NotNull;


@Entity
public class MyData {
	@Id
	@GeneratedValue(strategy = GenerationType.AUTO)
	@Column
	@NotNull
	private long id;

	@Column(length = 50, nullable = false)
	@NotEmpty
	private String name;

	@Column(length = 200, nullable = true)
	@Email
	private String mail;

	@Column(nullable = true)
	@Min(value=0)
	@Max(value=200)
	private Integer age;

	@Column(nullable = true)
	private String memo;

	@OneToMany
	private List<MsgData> msgdatas;

	public long getId() {
		return id;
	}

	public void setId(long id) {
		this.id = id;
	}

	public String getName() {
		return name;
	}

	public void setName(String name) {
		this.name = name;
	}

	public String getMail() {
		return mail;
	}

	public void setMail(String mail) {
		this.mail = mail;
	}

	public Integer getAge() {
		return age;
	}

	public void setAge(Integer age) {
		this.age = age;
	}

	public String getMemo() {
		return memo;
	}

	public void setMemo(String memo) {
		this.memo = memo;
	}

	public List<MsgData> getMsgdatas() {
		return msgdatas;
	}

	public void setMsgdatas(List<MsgData> msgdatas) {
		this.msgdatas = msgdatas;
	}

}

MsgDataを永続化するためのリポジトリを用意する。

package jp.abc.repositories;

import org.springframework.data.jpa.repository.JpaRepository;

import jp.abc.MyData;

public interface MsgDataRepository extends JpaRepository<MyData, Long> {

}

HTMLテンプレートを作成する。

<!DOCTYPE html>
<html xmlns:th="http://www.thymeleaf.org">
<head>
<meta charset="UTF-8">
<title th:text="${title}">top page</title>
<style type="text/css">
h1 {
  font-size: 18pt;
  font-weight: bold;
  color: gray;
}
body {
  font-size: 13pt;
  color: gray;
  margin: 5px 25px;
}
tr {
  margin: 5x;
}
th {
  padding: 5px;
  color: white;
  background: darkgray;
}
td {
  padding: 5px;
  color: black;
  background: #f0f0f0;
}
</style>
</head>
<body>
<h1 th:text="${title}">MyMsg page</h1>
<p th:text="${msg}"></p>
<form method="post" action="/msg" th:object="${formModel}">
  <input type="hidden" name="id" th:value="*{id}" />
  <table>
  	<tr>
  	  <td><label for="title">タイトル</label></td>
  	  <td><input type="text" name="title" th:value="*{title}" />
  	</tr>
  	<tr>
  	  <td><label for="message">メッセージ</label></td>
  	  <td><textarea name="message" th:text="*{message}"></textarea></td>
  	</tr>
  	<tr>
  	  <td><label for="mydata">MYDATA_ID</label></td>
  	  <td><input type="text" name="mydata" /></td>
  	</tr>
  	<tr>
  	  <td></td><td><input type="submit" /></td>
  	</tr>
  </table>
</form>

<hr />
<table>
  <tr>
    <th>ID</th><th>名前</th><th>タイトル</th>
  </tr>
  <tr th:each="obj : ${datalist}">
    <td th:text="${obj.id}"></td>
    <td th:text="${obj.mydata.name}"></td>
    <td th:text="${obj.title}"></td>
  </tr>
</table>
</body>
</html>

新しくコントローラを作成する。
まずはGETメソッドに対応する部分だけを作成。

MsgDataController.java

package jp.abc;

import java.util.List;

import org.springframework.beans.factory.annotation.Autowired;
import org.springframework.stereotype.Controller;
import org.springframework.web.bind.annotation.RequestMapping;
import org.springframework.web.bind.annotation.RequestMethod;
import org.springframework.web.servlet.ModelAndView;

import jp.abc.repositories.MsgDataRepository;

@Controller
public class MsgDataController {

	@Autowired
	private MsgDataRepository repository;

	@RequestMapping(value = "/msg", method=RequestMethod.GET)
	public ModelAndView msg(ModelAndView mav) {
		mav.setViewName("showMsgData");
		mav.addObject("title", "Sample");
		mav.addObject("msg", "MsgDataのサンプルです。");
		MsgData msgdata = new MsgData();
		mav.addObject("formModel", msgdata);
		List<MsgData> list = repository.findAll();
		mav.addObject("datalist", list);
		return mav;
	}
}

コントローラにPOSTメソッドを追加する。

package jp.abc;

import java.util.List;

import javax.validation.Valid;

import org.springframework.beans.factory.annotation.Autowired;
import org.springframework.stereotype.Controller;
import org.springframework.validation.Errors;
import org.springframework.web.bind.annotation.ModelAttribute;
import org.springframework.web.bind.annotation.RequestMapping;
import org.springframework.web.bind.annotation.RequestMethod;
import org.springframework.web.servlet.ModelAndView;

import jp.abc.repositories.MsgDataRepository;

@Controller
public class MsgDataController {

	@Autowired
	private MsgDataRepository repository;

	@RequestMapping(value = "/msg", method=RequestMethod.GET)
	public ModelAndView msg(ModelAndView mav) {
		mav.setViewName("showMsgData");
		mav.addObject("title", "Sample");
		mav.addObject("msg", "MsgDataのサンプルです。");
		MsgData msgdata = new MsgData();
		mav.addObject("formModel", msgdata);
		List<MsgData> list = repository.findAll();
		mav.addObject("datalist", list);
		return mav;
	}

	@RequestMapping(value = "/msg", method=RequestMethod.POST)
	public ModelAndView msgform(@Valid @ModelAttribute MsgData msgdata,
			Errors result,
			ModelAndView mav) {
		if (result.hasErrors()) {
			mav.setViewName("showMsgData");
			mav.addObject("title", "Sample [ERROR]");
			mav.addObject("msg", "値を再チェックしてください。");
			return mav;
		}
		repository.saveAndFlush(msgdata);
		return new ModelAndView("redirect:/msg");
	}
}

HTMLテンプレートの以下の部分でエラーが出てるので変更しておく。

  <input type="hidden" name="id" th:value="*{id}" />

↓↓↓↓↓↓

  <input type="hidden" name="id" value="0" />

6月25日

HSQLDBサーバーが動いたら、MyBootAppを起動する。
起動すると、自動的に3つのレコードが書き込まれる。
起動するたびにレコードが書き込まれるのはまずいので、以下のコードを削除する。

MyDataController.java

	@PostConstruct
	public void init() {
		MyData d1 = new MyData();
		d1.setName("tuyano");
		d1.setAge(123);
		d1.setMail("syoda@tuyano.com");
		d1.setMemo("this is data!");
		repository.saveAndFlush(d1);
		MyData d2 = new MyData();
		d2.setName("hanako");
		d2.setAge(15);
		d2.setMail("hanako@flower.com");
		d2.setMemo("this is data!");
		repository.saveAndFlush(d2);
		MyData d3 = new MyData();
		d3.setName("sachiko");
		d3.setAge(37);
		d3.setMail("sachiko@happy");
		d3.setMemo("this is data!");
		repository.saveAndFlush(d3);
	}

データベースマネージャを起動するBATファイルも作成する。
デスクトップにmanager.bat を作成する。

cd C:\pleiades\hsqldb-2.4.1\hsqldb\data
java -classpath ..\lib\hsqldb.jar org.hsqldb.util.DatabaseManager

データベースマネージャを起動すると、接続先設定の画面が出るので、以下のように入力する。

データベースのデータを毎回消さないようにするために、application.properties に設定を1行追加する。

spring.datasource.url=jdbc:hsqldb:hsql://localhost/mydata
spring.datasource.username=sa
spring.datasource.password=
spring.datasource.driver-class-name=org.hsqldb.jdbc.JDBCDriver
spring.jpa.properties.hibernate.dialect=org.hibernate.dialect.HSQLDialect
spring.jpa.hibernate.ddl-auto=update

DAOを使ったデータベースアクセス

Spring Boot ではリポジトリを使って容易にデータベースアクセスできる。
Java標準のJAPを使う場合は、一般的にDAOを使ってデータベースアクセスを実装する。

まずDAOインタフェースを作成する。

package jp.abc;

import java.io.Serializable;
import java.util.List;

public interface MyDataDao <T> extends Serializable {
	public List<T> getAll();
}

そして、DAOの実装クラスを作成する。

package jp.abc;

import java.util.List;

import javax.persistence.EntityManager;
import javax.persistence.Query;

import jp.abc.MyData;
import jp.abc.MyDataDao;

public class MyDataDaoImpl implements MyDataDao<MyData> {

	private EntityManager entityManager;

	public MyDataDaoImpl() {
		super();
	}
	public MyDataDaoImpl(EntityManager entityManager) {
		this();
		this.entityManager = entityManager;
	}

	@Override
	public List<MyData> getAll() {
		Query query = entityManager.createQuery("from MyData");
		List<MyData> list = query.getResultList();
		entityManager.close();
		return list;
	}

}

コントローラには、以下のコードを追加する。
URL: /dao にアクセスしたときに、DAO経由でデータベースアクセスを実行する。

	@PersistenceContext
	EntityManager entityManager;

	MyDataDao<MyData> dao;

	@PostConstruct
	public void init() {
		dao = new MyDataDaoImpl(entityManager);
	}

	@RequestMapping("/dao")
	public ModelAndView dao(ModelAndView mav) {
		mav.setViewName("dao");
		mav.addObject("msg", "DAOを使ったサンプルです。");
		List<MyData> list = dao.getAll();
		mav.addObject("datalist", list);
		return mav;
	}

HTMLテンプレートを dao.html として用意する。

<!DOCTYPE html>
<html xmlns:th="http://www.thymeleaf.org">
<head>
<meta charset="UTF-8">
<title>top page</title>
<meta http-equiv="Content-type" content="text/html; charset=UTF-8" />
<style type="text/css">
h1 {
  font-size: 18pt;
  font-weight: bold;
  color: gray;
}
body {
  font-size: 13pt;
  color: gray;
  margin: 5px 25px;
}
pre {
  border: solid 3px #ddd;
  padding: 10px;
}
tr {
  margin: 5px;
}
th {
  padding: 5px;
  color: white;
  background: darkgray;
}
td {
  padding: 5px;
  color: black;
  background: #f0f0f0;
}
.err {
  color: red;
}
</style>
</head>
<body>

<h1>MyData page</h1>
<p th:text="${msg}"></p>

<hr />
<table>
  <tr>
    <th>ID</th><th>名前</th><th>メール</th><th>年齢</th><th>メモ</th>
  </tr>
  <tr th:each="obj : ${datalist}">
    <td th:text="${obj.id}"></td>
    <td th:text="${obj.name}"></td>
    <td th:text="${obj.mail}"></td>
    <td th:text="${obj.age}"></td>
    <td th:text="${obj.memo}"></td>
  </tr>
</table>


</body>
</html>

6月21日

各入力フィールドにえらーを表示

エラーメッセージをそれぞれの入力フィールドの近くに表示するように、HTMLテンプレートを変更する。

<!DOCTYPE html>
<html xmlns:th="http://www.thymeleaf.org">
<head>
<meta charset="UTF-8">
<title>top page</title>
<meta http-equiv="Content-type" content="text/html; charset=UTF-8" />
<style type="text/css">
h1 {
  font-size: 18pt;
  font-weight: bold;
  color: gray;
}
body {
  font-size: 13pt;
  color: gray;
  margin: 5px 25px;
}
pre {
  border: solid 3px #ddd;
  padding: 10px;
}
tr {
  margin: 5px;
}
th {
  padding: 5px;
  color: white;
  background: darkgray;
}
td {
  padding: 5px;
  color: black;
  background: #f0f0f0;
}
.err {
  color: red;
}
</style>
</head>
<body>

<h1>MyData page</h1>
<p th:text="${msg}"></p>
<form method="post" action="/mydata" th:object="${formModel}">
  <table>
    <tr>
      <td><label for="name">名前</label></td>
      <td>
        <input type="text" name="name" th:value="*{name}"
      			th:errorclass="err" />
      	<div th:if="${#fields.hasErrors('name')}" th:errors="*{name}"
      		th:errorclass="err"></div>
      </td>
    </tr>
    <tr>
      <td><label for="age">年齢</label></td>
      <td>
        <input type="text" name="age" th:value="*{age}"
      			th:errorclass="err"/>
      	<div th:if="${#fields.hasErrors('age')}" th:errors="*{age}"
      		th:errorclass="err"></div>
      </td>
    </tr>
    <tr>
      <td><label for="mail">メール</label></td>
      <td>
        <input type="text" name="mail" th:value="*{mail}"
        	th:errorclass="err"/>
        <div th:if="${#fields.hasErrors('mail')}" th:errors="*{mail}"
        	th:errorclass="err"></div>
      </td>
    </tr>
    <tr>
      <td><label for="memo">メモ</label></td>
      <td><textarea name="memo" th:value="*{memo}" rows="5" cols="20"></textarea></td>
    </tr>
    <tr>
      <td></td>
      <td><input type="submit" /></td>
    </tr>
  </table>
</form>

<hr />
<table>
  <tr>
    <th>ID</th><th>名前</th><th>編集</th><th>削除</th>
  </tr>
  <tr th:each="obj : ${datalist}">
    <td th:text="${obj.id}"></td>
    <td th:text="${obj.name}"></td>
    <td><a th:href="@{'/edit/' + ${obj.id}}">編集</a></td>
    <td><a th:href="@{'/delete/' + ${obj.id}}">削除</a></td>
  </tr>
</table>


<pre th:text="${data}"></pre>


</body>
</html>

エラーメッセージを日本語で表示する

バリデーション条件を指定するアノテーションにmessageパラメータを追加することで、メッセージをカスタマイズできる。

package jp.abc;

import javax.persistence.Column;
import javax.persistence.Entity;
import javax.persistence.GeneratedValue;
import javax.persistence.GenerationType;
import javax.persistence.Id;
import javax.validation.constraints.Email;
import javax.validation.constraints.Max;
import javax.validation.constraints.Min;
import javax.validation.constraints.NotEmpty;
import javax.validation.constraints.NotNull;


@Entity
public class MyData {
	@Id
	@GeneratedValue(strategy = GenerationType.AUTO)
	@Column
	@NotNull
	private long id;

	@Column(length = 50, nullable = false)
	@NotEmpty(message="空白は不可")
	private String name;

	@Column(length = 200, nullable = true)
	@Email(message="メールアドレスのみ")
	private String mail;

	@Column(nullable = true)
	@Min(value=0, message="0以上")
	@Max(value=200, message="200以下")
	private Integer age;

	@Column(nullable = true)
	private String memo;

	public long getId() {
		return id;
	}

	public void setId(long id) {
		this.id = id;
	}

	public String getName() {
		return name;
	}

	public void setName(String name) {
		this.name = name;
	}

	public String getMail() {
		return mail;
	}

	public void setMail(String mail) {
		this.mail = mail;
	}

	public Integer getAge() {
		return age;
	}

	public void setAge(Integer age) {
		this.age = age;
	}

	public String getMemo() {
		return memo;
	}

	public void setMemo(String memo) {
		this.memo = memo;
	}

}

プロパティーファイルを用意してメッセージをまとめて扱う

バリデーション用アノテーションに message 引数を追加してメッセージをカスタマイズする方法とは別に、プロパティーファイルを使う方法がある。

resources フォルダにValidationMessages.properties ファイルを作成する。
作成したファイルを右クリックして[次で開く]-[Limyプロパティーエディター]を選択する。

プロパティーファイルの内容はバリデーション用アノテーションのクラス名に続けて「.message = 」を追加して、右辺にカスタマイズしたメッセージを記述する。
MinとMaxは、アノテーションにvalue引数で渡した値を {value} で受け取って表示できる。

javax.validation.constraints.NotEmpty.message = 空白は不可です。
javax.validation.constraints.Email.message = メールアドレスではありません。
javax.validation.constraints.Min.message = {value}より大きくしてください。
javax.validation.constraints.Max.message = {value}より小さくしてください。

HSQLDBサーバーを起動する

HSQLDBをダウンロードする。
検索して公式サイトからhsqldb-2.4.1.zip をダウンロードする。
ZIPファイルを解凍したフォルダを、C:\pleiades\ に置く。

デスクトップに起動用BATファイル hsqldb.bat を作成する。

cd C:\pleiades\hsqldb-2.4.1\hsqldb\lib
java -cp hsqldb.jar org.hsqldb.Server --database.0 db/mydata --dbname.0 mydata

Macの人は、「書類」フォルダにHSQLDBを解凍する。
書類フォルダなどにテキストファイル hsqldb.sh を作成する。

#!/bin/sh
cd ~/Documents/hsqldb/lib
java -cp hsqldb.jar org.hsqldb.Server --database.0 db/mydata --dbname.0 mydata

hsqldb.sh を作成後、ターミナルで以下のコマンドを実行する。

$ cd ~/Documents
# chmod +x ./hsqldb.sh

hsqldb.bat をダブルクリックすると、HSQLDBサーバーが起動する。
コマンドプロンプトの画面を閉じるとHSQLDBサーバーが終了するので閉じないこと。
誤って閉じないように最小化しておく。

application.properties ファイルに以下の内容を記述する。

spring.datasource.url=jdbc:hsqldb:hsql://localhost/mydata
spring.datasource.username=sa
spring.datasource.password=
spring.datasource.driver-class-name=org.hsqldb.jdbc.JDBCDriver
spring.jpa.properties.hibernate.dialect=org.hibernate.dialect.HSQLDialect

6月18日

MyDataの更新

MyDataを更新する機能を追加する。
まず、HTMLテンプレートとして edit.html を用意した(前回)。

次にリポジトリに findById() メソッドを追加する。

package jp.abc.repositories;

import java.util.Optional;

import org.springframework.data.jpa.repository.JpaRepository;
import org.springframework.stereotype.Repository;

import jp.abc.MyData;

@Repository
public interface MyDataRepository extends JpaRepository<MyData, Long> {
	public Optional<MyData> findById(Long id);
}

コントローラに URL /edit/ を受け付けるメソッドを追加する。

	@RequestMapping(value = "/edit/{id}", method = RequestMethod.GET)
	public ModelAndView edit(@ModelAttribute MyData mydata,
			@PathVariable int id,
			ModelAndView mav) {
		mav.setViewName("edit");
		mav.addObject("title", "edit mydata");
		Optional<MyData> data = repository.findById((long)id);
		mav.addObject("formModel", data.get());
		return mav;
	}

	@RequestMapping(value = "/edit/{id}", method = RequestMethod.POST)
	@Transactional(readOnly = false)
	public ModelAndView update(@ModelAttribute MyData mydata,
			ModelAndView mav) {
		repository.saveAndFlush(mydata);
		return new ModelAndView("redirect:/mydata");
	}

エンティティの削除

HTMLテンプレート delete.html を追加する。

<!DOCTYPE html>
<html xmlns:th="http://www.thymeleaf.org">
<head>
<meta charset="UTF-8">
<title>top page</title>
<meta http-equiv="Content-type" content="text/html; charset=UTF-8" />
<style type="text/css">
h1 {
  font-size: 18pt;
  font-weight: bold;
  color: gray;
}
body {
  font-size: 13pt;
  color: gray;
  margin: 5px 25px;
}
pre {
  border: solid 3px #ddd;
  padding: 10px;
}
tr {
  margin: 5px;
}
th {
  padding: 5px;
  color: white;
  background: darkgray;
}
td {
  padding: 5px;
  color: black;
  background: #f0f0f0;
}
</style>
</head>
<body>

<h1>MyData delete page</h1>

<form method="post" action="/delete" th:object="${formModel}">
  <input type="hidden" name="id" th:value="*{id}" />
  <table>
    <tr><td><p th:text="|名前 : *{name}|"></p></td></tr>
    <tr><td><p th:text="|年齢 : *{age}|"></p></td></tr>
    <tr><td><p th:text="*{mail}"></p></td></tr>
    <tr><td><p th:text="*{memo}"></p></td></tr>
    <tr><td><input type="submit" value="削除" /></td></tr>
  </table>
</form>


</body>
</html>

コントローラに、削除関連のリクエストを受け取るメソッドを追加する。

	@RequestMapping(value = "/delete/{id}", method = RequestMethod.GET)
	public ModelAndView delete(@PathVariable int id,
			ModelAndView mav) {
		mav.setViewName("delete");
		mav.addObject("title", "delete mydata");
		Optional<MyData> data = repository.findById((long)id);
		mav.addObject("formModel", data.get());
		return mav;
	}

	@RequestMapping(value = "/delete", method = RequestMethod.POST)
	@Transactional(readOnly = false)
	public ModelAndView remove(@RequestParam long id,
			ModelAndView mav) {
		repository.deleteById(id);
		return new ModelAndView("redirect:/mydata");
	}

エンティティのバリデーション

バリデーションは、エンティティのフィールドにアノテーションを追加することで入力値の制限ができる。

package jp.abc;

import javax.persistence.Column;
import javax.persistence.Entity;
import javax.persistence.GeneratedValue;
import javax.persistence.GenerationType;
import javax.persistence.Id;
import javax.validation.constraints.Email;
import javax.validation.constraints.Max;
import javax.validation.constraints.Min;
import javax.validation.constraints.NotEmpty;
import javax.validation.constraints.NotNull;


@Entity
public class MyData {
	@Id
	@GeneratedValue(strategy = GenerationType.AUTO)
	@Column
	@NotNull
	private long id;

	@Column(length = 50, nullable = false)
	@NotEmpty
	private String name;

	@Column(length = 200, nullable = true)
	@Email
	private String mail;

	@Column(nullable = true)
	@Min(0)
	@Max(200)
	private Integer age;

	@Column(nullable = true)
	private String memo;

	public long getId() {
		return id;
	}

	public void setId(long id) {
		this.id = id;
	}

	public String getName() {
		return name;
	}

	public void setName(String name) {
		this.name = name;
	}

	public String getMail() {
		return mail;
	}

	public void setMail(String mail) {
		this.mail = mail;
	}

	public Integer getAge() {
		return age;
	}

	public void setAge(Integer age) {
		this.age = age;
	}

	public String getMemo() {
		return memo;
	}

	public void setMemo(String memo) {
		this.memo = memo;
	}

}

コントローラの引数でバリデーションの結果を受け取る。

	@RequestMapping(value = "/mydata", method = RequestMethod.POST)
	public ModelAndView form(
			@ModelAttribute("formModel") @Validated MyData mydata,
			BindingResult result,
			ModelAndView mav) {
		if (!result.hasErrors()) {
			repository.saveAndFlush(mydata);
			return new ModelAndView("redirect:/mydata");
		}
		mav.setViewName("mydata");
		mav.addObject("msg", "sorry, error is occured...");
		Iterable<MyData> list = repository.findAll();
		mav.addObject("datalist", list);
		return mav;
	}

HTMLテンプレートでエラーメッセージを表示する。

td {
  padding: 5px;
  color: black;
  background: #f0f0f0;
}
.err {
  color: red;
}
</style>
</head>
<body>

<h1>MyData page</h1>
<p th:text="${msg}"></p>
<form method="post" action="/mydata" th:object="${formModel}">
<ul>
  <li th:each="error : ${#fields.detailedErrors()}" class="err"
      th:text="${error.message}" />
</ul>
  <table>
    <tr>
      <td><label for="name">名前</label></td>
      <td><input type="text" name="name" th:value="*{name}" /></td>
    </tr>

6月14日

モデルとデータベース

データベースのテーブルに対応するPOJOクラスとしてMyDataを定義する。
MyDataクラスには、エンティティであることを示すために @Entity アノテーションをつける。

package jp.abc;

import javax.persistence.Column;
import javax.persistence.Entity;
import javax.persistence.GeneratedValue;
import javax.persistence.GenerationType;
import javax.persistence.Id;

@Entity
public class MyData {
	@Id
	@GeneratedValue(strategy = GenerationType.AUTO)
	@Column
	private long id;

	@Column(length = 50, nullable = false)
	private String name;

	@Column(length = 200, nullable = true)
	private String mail;

	@Column(nullable = true)
	private Integer age;

	@Column(nullable = true)
	private String memo;

	public long getId() {
		return id;
	}

	public void setId(long id) {
		this.id = id;
	}

	public String getName() {
		return name;
	}

	public void setName(String name) {
		this.name = name;
	}

	public String getMail() {
		return mail;
	}

	public void setMail(String mail) {
		this.mail = mail;
	}

	public Integer getAge() {
		return age;
	}

	public void setAge(Integer age) {
		this.age = age;
	}

	public String getMemo() {
		return memo;
	}

	public void setMemo(String memo) {
		this.memo = memo;
	}

}

MyData エンティティをデータベースに格納するためのインタフェースを定義する。
JpaRepositoryを継承して定義する。
テキストでは新たに repositories パッケージを作ってその中に作っているので、それにならう。

package jp.abc.repositories;

import org.springframework.data.jpa.repository.JpaRepository;
import org.springframework.stereotype.Repository;

import jp.abc.MyData;

@Repository
public interface MyDataRepository extends JpaRepository<MyData, Long> {

}

MyDataを扱うために、コントローラを新しく用意する。

MyDataController

package jp.abc;

import org.springframework.beans.factory.annotation.Autowired;
import org.springframework.stereotype.Controller;
import org.springframework.web.bind.annotation.RequestMapping;
import org.springframework.web.servlet.ModelAndView;

import jp.abc.repositories.MyDataRepository;

@Controller
public class MyDataController {

	@Autowired
	private MyDataRepository repository;

	@RequestMapping("/mydata")
	public ModelAndView index(ModelAndView mav) {
		mav.setViewName("mydata");
		mav.addObject("msg", "this is sample content.");
		Iterable<MyData> list = repository.findAll();
		mav.addObject("data", list);
		return mav;
	}
}

新たに mydata.html を作成する。

mydata.html

<!DOCTYPE html>
<html xmlns:th="http://www.thymeleaf.org">
<head>
<meta charset="UTF-8">
<title>top page</title>
<meta http-equiv="Content-type" content="text/html; charset=UTF-8" />
<style type="text/css">
h1 {
  font-size: 18pt;
  font-weight: bold;
  color: gray;
}
body {
  font-size: 13pt;
  color: gray;
  margin: 5px 25px;
}
pre {
  border: solid 3px #ddd;
  padding: 10px;
}
</style>
</head>
<body>

<h1>MyData page</h1>
<pre th:text="${data}"></pre>

</body>
</html>

エンティティのCRUD

フォームでデータを保存するために、HTMLに入力フォームを追加する。

<!DOCTYPE html>
<html xmlns:th="http://www.thymeleaf.org">
<head>
<meta charset="UTF-8">
<title>top page</title>
<meta http-equiv="Content-type" content="text/html; charset=UTF-8" />
<style type="text/css">
h1 {
  font-size: 18pt;
  font-weight: bold;
  color: gray;
}
body {
  font-size: 13pt;
  color: gray;
  margin: 5px 25px;
}
pre {
  border: solid 3px #ddd;
  padding: 10px;
}
tr {
  margin: 5px;
}
th {
  padding: 5px;
  color: white;
  background: darkgray;
}
td {
  padding: 5px;
  color: black;
  background: #f0f0f0;
}
</style>
</head>
<body>

<h1>MyData page</h1>

<form method="post" action="/mydata" th:object="${formModel}">
  <table>
    <tr>
      <td><label for="name">名前</label></td>
      <td><input type="text" name="name" th:value="*{name}" /></td>
    </tr>
    <tr>
      <td><label for="age">年齢</label></td>
      <td><input type="text" name="age" th:value="*{age}" /></td>
    </tr>
    <tr>
      <td><label for="mail">メール</label></td>
      <td><input type="text" name="mail" th:value="*{mail}" /></td>
    </tr>
    <tr>
      <td><label for="memo">メモ</label></td>
      <td><textarea name="memo" th:value="*{memo}" rows="5" cols="20"></textarea></td>
    </tr>
    <tr>
      <td></td>
      <td><input type="submit" /></td>
    </tr>
  </table>
</form>

<hr />
<table>
  <tr>
    <th>ID</th><th>名前</th>
  </tr>
  <tr th:each="obj : ${datalist}">
    <td th:text="${obj.id}"></td>
    <td th:text="${obj.name}"></td>
  </tr>
</table>


<pre th:text="${data}"></pre>


</body>
</html>

コントローラを変更する。
GETメソッドとPOSTメソッドで別の処理をやりたいので、(Javaクラスの)メソッドを分ける。
そのために、@RequestMapping アノテーションの引数で RequestMethodを指定する。
HTMLテンプレートのフォームから渡されるデータは、@ModelAttribute アノテーションでオブジェクト名を指定する。

package jp.abc;

import org.springframework.beans.factory.annotation.Autowired;
import org.springframework.stereotype.Controller;
import org.springframework.web.bind.annotation.ModelAttribute;
import org.springframework.web.bind.annotation.RequestMapping;
import org.springframework.web.bind.annotation.RequestMethod;
import org.springframework.web.servlet.ModelAndView;

import jp.abc.repositories.MyDataRepository;

@Controller
public class MyDataController {

	@Autowired
	private MyDataRepository repository;

	@RequestMapping(value = "/mydata", method = RequestMethod.GET)
	public ModelAndView index(
			@ModelAttribute("formModel") MyData mydata,
			ModelAndView mav) {
		mav.setViewName("mydata");
		mav.addObject("msg", "this is sample content.");
		Iterable<MyData> list = repository.findAll();
		mav.addObject("datalist", list);
		mav.addObject("data", list);
		return mav;
	}

	@RequestMapping(value = "/mydata", method = RequestMethod.POST)
	public ModelAndView form(
			@ModelAttribute("formModel") MyData mydata,
			ModelAndView mav) {
		repository.saveAndFlush(mydata);
		return new ModelAndView("redirect:/mydata");
	}
}

MyDataを編集するためのHTMLテンプレート edit.html を作成する。
mydata.html とほぼ同じなので、mydata.html をコピーしてファイル名を edit.html にして保存する。

<!DOCTYPE html>
<html xmlns:th="http://www.thymeleaf.org">
<head>
<meta charset="UTF-8">
<title>top page</title>
<meta http-equiv="Content-type" content="text/html; charset=UTF-8" />
<style type="text/css">
h1 {
  font-size: 18pt;
  font-weight: bold;
  color: gray;
}
body {
  font-size: 13pt;
  color: gray;
  margin: 5px 25px;
}
pre {
  border: solid 3px #ddd;
  padding: 10px;
}
tr {
  margin: 5px;
}
th {
  padding: 5px;
  color: white;
  background: darkgray;
}
td {
  padding: 5px;
  color: black;
  background: #f0f0f0;
}
</style>
</head>
<body>

<h1>MyData edit page</h1>

<form method="post" action="/edit" th:object="${formModel}">
  <input type="hidden" name="id" th:value="*{id}" />
  <table>
    <tr>
      <td><label for="name">名前</label></td>
      <td><input type="text" name="name" th:value="*{name}" /></td>
    </tr>
    <tr>
      <td><label for="age">年齢</label></td>
      <td><input type="text" name="age" th:value="*{age}" /></td>
    </tr>
    <tr>
      <td><label for="mail">メール</label></td>
      <td><input type="text" name="mail" th:value="*{mail}" /></td>
    </tr>
    <tr>
      <td><label for="memo">メモ</label></td>
      <td><textarea name="memo" th:value="*{memo}" rows="5" cols="20"></textarea></td>
    </tr>
    <tr>
      <td></td>
      <td><input type="submit" /></td>
    </tr>
  </table>
</form>


</body>
</html>

コントローラに初期データを登録するメソッドを追加する。
@PostConstruct アノテーションを指定すると、コンストラクタが呼ばれた直後に、このメソッドが呼び出される。

	@PostConstruct
	public void init() {
		MyData d1 = new MyData();
		d1.setName("tuyano");
		d1.setAge(123);
		d1.setMail("syoda@tuyano.com");
		d1.setMemo("this is data!");
		repository.saveAndFlush(d1);
		MyData d2 = new MyData();
		d2.setName("hanako");
		d2.setAge(15);
		d2.setMail("hanako@flower.com");
		d2.setMemo("this is data!");
		repository.saveAndFlush(d2);
		MyData d3 = new MyData();
		d3.setName("sachiko");
		d3.setAge(37);
		d3.setMail("sachiko@happy");
		d3.setMemo("this is data!");
		repository.saveAndFlush(d3);
	}

6月11日

条件分岐

ログインするWebサイトで、ログインしてない人に「ゲスト」と表示したり、ログインした人に「ようこそ〇〇さん!」のように表示するときに条件分岐を使用する。

テキストではp.180からの部分。

IndexController.java の最後にメソッドを追加する。
メソッド名、URL、HTMLテンプレートの名前を number にする。

	@RequestMapping("/number/{id}")
	public ModelAndView number(@PathVariable int id, ModelAndView mav) {
		mav.setViewName("number");
		mav.addObject("id", id);
		mav.addObject("check", id >= 0);
		mav.addObject("trueVal", "POSITIVE!");
		mav.addObject("falseVal", "negative...");
		return mav;
	}

HTMLテンプレートで th:if と th:unless を使用して条件分岐する。

<body>
<h1>条件分岐</h1>
<p th:if="${check}" th:text="${id} + ' is ' + ${trueVal}">message.</p>
<p th:unless="${check}" th:text="${id} + ' is ' + ${falseVal}">message.</p>
</body>

switchを使って多項分岐する

月の値から季節を表示する。

IndexController.java に month() メソッドを追加する。

	@RequestMapping("/month/{month}")
	public ModelAndView month(@PathVariable int month, ModelAndView mav) {
		mav.setViewName("month");
		int m = Math.abs(month) % 12;
		m = m == 0 ? 12 : m;
		mav.addObject("month", m);
		mav.addObject("check", Math.floor(m / 3));
		return mav;
	}

HTMLテンプレートは、month.html を追加する。

<body>
<h1>多項分岐</h1>

<div th:switch="${check}">
  <p th:case="0" th:text="|${month} - Winter|"></p>
  <p th:case="1" th:text="|${month} - Spring|"></p>
  <p th:case="2" th:text="|${month} - Summer|"></p>
  <p th:case="3" th:text="|${month} - Autumn|"></p>
  <p th:case="4" th:text="|${month} - Winter|"></p>
</div>

</body>

th:eachで繰り返し表示する

IndexController.java に list() メソッドを追加する。

	@RequestMapping("/list/")
	public ModelAndView list(ModelAndView mav) {
		mav.setViewName("list");
		ArrayList<String[]> data = new ArrayList<>();
		data.add(new String[] {"taro", "taro@yamada", "090-999-999"});
		data.add(new String[] {"hanako", "hanako@flower", "080-888-888"});
		data.add(new String[] {"sachiko", "sachiko@happy", "070-777-777"});
		mav.addObject("data", data);
		return mav;
	}

list.html を追加する。

<body>
<h1>繰り返し</h1>

<table>
  <tr>
    <th>NAME</th>
    <th>MAIL</th>
    <th>TEL</th>
  </tr>
  <tr th:each="obj:${data}">
    <td th:text="${obj[0]}"></td>
    <td th:text="${obj[1]}"></td>
    <td th:text="${obj[2]}"></td>
  </tr>
</table>

</body>

JavaScript のインライン処理

Webサイトを作っていると、コントローラからJavaScriptに値を渡したいことがあるので、そのやり方を試してみる。

InddexController.java に tax() メソッドを追加する。

	@RequestMapping("/tax/{tax}")
	public ModelAndView tax(@PathVariable int tax, ModelAndView mav) {
		mav.setViewName("tax");
		mav.addObject("tax", tax);
		return mav;
	}

tax.html を作成する。

<!DOCTYPE html>
<html xmlns:th="http://www.thymeleaf.org">
<head>
<meta charset="UTF-8">
<title>消費税計算</title>
<style type="text/css">
h1 {
  font-size: 18pt;
  font-weight: bold;
  color: gray;
}
body {
  font-size: 13pt;
  color: gray;
  margin: 5px 25px;
}
</style>
<script th:inline="javascript">
function action() {
	var val = document.getElementById("text1").value;
	var res = parseInt(val * ((100 + /*[[${tax}]]*/) / 100));
	document.getElementById("msg").innerHTML = "include tax: " + res;
}
</script>
</head>
<body>
<h1>JavaScriptのインライン処理で消費税計算</h1>
<p id="msg"></p>
<input type="text" id="text1" />
<button onclick="action()">click</button>
</body>
</html>

テンプレートフラグメント

part.html を作成する。

<!DOCTYPE html>
<html xmlns:th="http://www.thymeleaf.org">
<head>
<meta charset="UTF-8">
<title>part page</title>
<style th:fragment="frag_style">
div.fragment {
  border:solid 3px lightgray;
  padding: 0px 20px;
}
</style>
</head>
<body>

  <h1>Part page</h1>
  <div th:fragment="frag_body">
    <h2>fragment</h2>
    <div class="fragment">
      <p>this is fragment content.</p>
      <p>sample message..</p>
    </div>
  </div>

</body>
</html>

frag.html を作成する。

<!DOCTYPE html>
<html xmlns:th="http://www.thymeleaf.org">
<head>
<meta charset="UTF-8">
<title>top page</title>
<style th:include="part :: frag_style"></style>
</head>
<body>

  <h1>Top page</h1>
  <div th:include="part :: frag_body">
    <p>this is original content.</p>
  </div>

</body>
</html>

IndexController.java に frag() メソッドを追加する。

	@RequestMapping("/frag")
	public String frag() {
		return "frag";
	}

frag.html にヘッダーとフッターを別ファイルから読み込むようにしてみる。

<body>

  <div th:include="part :: header">
    <p>this is original content.</p>
  </div>

  <h1>Top page</h1>
  <div th:include="part :: frag_body">
    <p>this is original content.</p>
  </div>
  <p>ここが本文ですよ</p>

  <div th:include="part :: footer">
    <p>this is original content.</p>
  </div>

</body>

part.html に共通で使うヘッダーとフッターを用意する。

<body>

  <div th:fragment="header">
    <p>ここがヘッダーです</p>
    <hr />
  </div>

  <h1>Part page</h1>
  <div th:fragment="frag_body">
    <h2>fragment</h2>
    <div class="fragment">
      <p>this is fragment content.</p>
      <p>sample message..</p>
    </div>
  </div>

  <div th:fragment="footer">
    <hr />
    <p>ここがフッターです</p>
  </div>

</body>

モデルとデータベース

次章のモデルとデータベースに進む準備として、pom.xml に新しい依存関係を追加する。

<?xml version="1.0" encoding="UTF-8"?>
<project xmlns="http://maven.apache.org/POM/4.0.0" xmlns:xsi="http://www.w3.org/2001/XMLSchema-instance"
	xsi:schemaLocation="http://maven.apache.org/POM/4.0.0 http://maven.apache.org/xsd/maven-4.0.0.xsd">
	<modelVersion>4.0.0</modelVersion>
	<parent>
		<groupId>org.springframework.boot</groupId>
		<artifactId>spring-boot-starter-parent</artifactId>
		<version>2.1.4.RELEASE</version>
		<relativePath/> <!-- lookup parent from repository -->
	</parent>
	<groupId>jp.abc</groupId>
	<artifactId>MyBootApp</artifactId>
	<version>0.0.1-SNAPSHOT</version>
	<name>MyBootApp</name>
	<description>Demo project for Spring Boot</description>

	<properties>
		<java.version>1.8</java.version>
	</properties>

	<dependencies>
		<dependency>
			<groupId>org.springframework.boot</groupId>
			<artifactId>spring-boot-starter-web</artifactId>
		</dependency>

		<dependency>
			<groupId>org.springframework.boot</groupId>
			<artifactId>spring-boot-starter-test</artifactId>
			<scope>test</scope>
		</dependency>

		<dependency>
			<groupId>org.springframework.boot</groupId>
			<artifactId>spring-boot-starter-thymeleaf</artifactId>
		</dependency>

		<dependency>
			<groupId>org.springframework.boot</groupId>
			<artifactId>spring-boot-starter-data-jpa</artifactId>
		</dependency>

		<dependency>
			<groupId>org.hsqldb</groupId>
			<artifactId>hsqldb</artifactId>
		</dependency>

	</dependencies>

	<build>
		<plugins>
			<plugin>
				<groupId>org.springframework.boot</groupId>
				<artifactId>spring-boot-maven-plugin</artifactId>
			</plugin>
		</plugins>
	</build>

</project>

6月7日

Gitにコミットする前に、.gitignoreファイルを編集する。
プロジェクト・エクスプローラーの右上の▽をクリックして「フィルターおよびカスタマイズ」を選択する。
「.*リソース」のチェックを外してOKする。
.gitignoreファイルが見えるようになるので、以下の行を追加する。

HELP.md
/target/
!.mvn/wrapper/maven-wrapper.jar
/.mvn/
mvnw
mvnw.cmd

### STS ###
.apt_generated
.classpath
.factorypath
.project
.settings
.springBeans
.sts4-cache
:
:

プロジェクトを右クリックして[チーム]-[コミット]を選択する。
コミットするファイルを選択して、コミットメッセージを入力し、右下の「コミット」をクリック。
Gitリポジトリにコミットされる。

フォワードとリダイレクト

テキストではp.158のリスト3-23に書かれている内容。
ここでは、IndexControllerに追加してみる。

package jp.abc;

import org.springframework.stereotype.Controller;
import org.springframework.ui.Model;
import org.springframework.web.bind.annotation.PathVariable;
import org.springframework.web.bind.annotation.RequestMapping;
import org.springframework.web.bind.annotation.RequestMethod;
import org.springframework.web.bind.annotation.RequestParam;
import org.springframework.web.servlet.ModelAndView;

@Controller
public class IndexController {

	@RequestMapping("/index/{num}")
	public String index(@PathVariable int num, Model model) {
		int res = 0;
		for (int i = 1; i <= num; i++) {
			res += i;
		}
		model.addAttribute("msg", "total: " + res);
		return "index";
	}

	@RequestMapping("/mav/{num}")
	public ModelAndView mav(@PathVariable int num, ModelAndView mav) {
		int res = 0;
		for (int i = 1; i <= num; i++) {
			res += i;
		}
		mav.addObject("msg", "total: " + res);
		mav.setViewName("index");
		return mav;
	}

	@RequestMapping(value="/form1", method=RequestMethod.GET)
	public ModelAndView form1(ModelAndView mav) {
		mav.setViewName("form1");
		mav.addObject("msg", "お名前を書いて送信してください");
		return mav;
	}

	@RequestMapping(value="/form1", method=RequestMethod.POST)
	public ModelAndView send(@RequestParam("text1")String str,
			@RequestParam("text2")String str2,
			ModelAndView mav) {
		int p = (str + str2).hashCode() % 101;
		p = Math.abs(p);
		mav.addObject("msg", "こんにちは" + str + "さん!");
		mav.addObject("result", str + "さんの"
							+ str2 + "度は、" + p +"%です。");
		mav.addObject("value", str);
		mav.addObject("text2", str2);
		mav.setViewName("form1");
		return mav;
	}

	@RequestMapping("/other")
	public String other() {
		return "redirect:/";
	}

	@RequestMapping("/home")
	public String home() {
		return "forward:/";
	}

}

Thymeleafをマスターする

IndexControllerの最後に以下のメソッドを追加する。

	@RequestMapping("/date")
	public String date() {
		return "index";
	}

index.html に1行追加する。

<h1>helo page</h1>
<p class="msg">this is Thymeleaf sample page</p>
<p class="msg" th:text="${msg}"></p>
<p th:text="${new java.util.Date().toString()}"></p>

ユーティリティオブジェクト

Thymeleafにはユーティリティオブジェクトが用意されているので、使ってみる。
index.html に以下の内容を追加する。

<p th:text="${#dates.format(new java.util.Date(), 'dd/MMM/yyyy HH:mm')}"></p>
<p th:text="${#numbers.formatInteger(1234, 7)}"></p>
<p th:text="${#strings.toUpperCase('Welcome to Spring')}"></p>

パラメータへのアクセス

index.html にさらに追加する。

<p th:text="'from parameter... id=' + ${param.id[0]}"></p>
<p th:text="'name=' + ${param.name[0]}"></p>

URLにパラメータを追加すると、その値が表示される。

http://localhost:8080/date?id=12345&name=taro

選択オブジェクトへの変数式

既存のコードが長くなってきたので、新しくコントローラを作成する。

ObjectController.java

package jp.abc;

import org.springframework.stereotype.Controller;
import org.springframework.web.bind.annotation.RequestMapping;
import org.springframework.web.servlet.ModelAndView;

@Controller
public class ObjectController {
	@RequestMapping("/obj")
	public ModelAndView index(ModelAndView mav) {
		mav.setViewName("obj");
		mav.addObject("msg", "current data");
		DataObject obj = new DataObject(123, "hanako", "hanako@flower");
		mav.addObject("obj", obj);
		return mav;
	}
}

HTMLも新規作成する。

obj.html

<!DOCTYPE html>
<html xmlns:th="http://www.thymeleaf.org">
<head>
<meta charset="UTF-8">
<title>選択オブジェクト</title>
<style type="text/css">
h1 {
  font-size: 18pt;
  font-weight: bold;
  color: gray;
}
body {
  font-size: 13pt;
  color: gray;
  margin: 5px 25px;
}
tr {
  margin: 5x;
}
th {
  padding: 5px;
  color: white;
  background: darkgray;
}
td {
  padding: 5px;
  color: black;
  background: #f0f0f0;
}
</style>
</head>
<body>
<h1>選択オブジェクトの変数式</h1>
<p th:text="${msg}"></p>
<table th:object="${obj}">
  <tr><th>ID</th><td th:text="*{id}"></td></tr>
  <tr><th>NAME</th><td th:text="*{name}"></td></tr>
  <tr><th>MAIL</th><td th:text="*{value}"></td></tr>
</table>

</body>
</html>

リテラル置換

obj.html に以下のコードを追加する。

<div th:object="${obj}">
  <p th:text="|my name is *{name}. mail address is *{value}.|">message.</p>
</div>

HTMLコードの出力

ObjectController に以下のコードを追加する。

	public ModelAndView index(ModelAndView mav) {
		mav.setViewName("obj");
		mav.addObject("msg", "current data");
		DataObject obj = new DataObject(123, "hanako", "hanako@flower");
		mav.addObject("obj", obj);
		mav.addObject("code", "msg1<hr />msg2<br />msg3");
		return mav;
	}

obj.html に以下のコードを追加する。

<p th:text="${code}">message.</p>

条件式

IndexControllerの date() メソッドを以下のように書き換える。

	@RequestMapping("/date")
	public ModelAndView date(
			@RequestParam("id")int id,
			ModelAndView mav) {
		mav.setViewName("index");
		mav.addObject("id", id);
		mav.addObject("check", id % 2 == 0);
		mav.addObject("trueVal", "Even number!");
		mav.addObject("falseVal", "Odd number..");
		return mav;
	}

index.html に以下のコードを追加する。

<p th:text="${id} + ' is ' + (${check} ? ${trueVal} : ${falseVal})"></p>

6月4日

ModelAndViewクラスの利用

ModelAndViewクラスは、データとビューに関する情報をまとめて管理できる。

package jp.abc;

import org.springframework.stereotype.Controller;
import org.springframework.ui.Model;
import org.springframework.web.bind.annotation.PathVariable;
import org.springframework.web.bind.annotation.RequestMapping;
import org.springframework.web.servlet.ModelAndView;

@Controller
public class IndexController {

	@RequestMapping("/index/{num}")
	public String index(@PathVariable int num, Model model) {
		int res = 0;
		for (int i = 1; i <= num; i++) {
			res += i;
		}
		model.addAttribute("msg", "total: " + res);
		return "index";
	}

	@RequestMapping("/mav/{num}")
	public ModelAndView mav(@PathVariable int num, ModelAndView mav) {
		int res = 0;
		for (int i = 1; i <= num; i++) {
			res += i;
		}
		mav.addObject("msg", "total: " + res);
		mav.setViewName("index");
		return mav;
	}
}

フォームを利用したデータの送信

コントローラは、HTTPメソッドのGETとPOSTを区別して受信するように、それぞれにメソッドを用意する。

package jp.abc;

import org.springframework.stereotype.Controller;
import org.springframework.ui.Model;
import org.springframework.web.bind.annotation.PathVariable;
import org.springframework.web.bind.annotation.RequestMapping;
import org.springframework.web.bind.annotation.RequestMethod;
import org.springframework.web.bind.annotation.RequestParam;
import org.springframework.web.servlet.ModelAndView;

@Controller
public class IndexController {

	@RequestMapping("/index/{num}")
	public String index(@PathVariable int num, Model model) {
		int res = 0;
		for (int i = 1; i <= num; i++) {
			res += i;
		}
		model.addAttribute("msg", "total: " + res);
		return "index";
	}

	@RequestMapping("/mav/{num}")
	public ModelAndView mav(@PathVariable int num, ModelAndView mav) {
		int res = 0;
		for (int i = 1; i <= num; i++) {
			res += i;
		}
		mav.addObject("msg", "total: " + res);
		mav.setViewName("index");
		return mav;
	}

	@RequestMapping(value="/form1", method=RequestMethod.GET)
	public ModelAndView form1(ModelAndView mav) {
		mav.setViewName("form1");
		mav.addObject("msg", "お名前を書いて送信してください");
		return mav;
	}

	@RequestMapping(value="/form1", method=RequestMethod.POST)
	public ModelAndView send(@RequestParam("text1")String str,
			ModelAndView mav) {
		mav.addObject("msg", "こんにちは" + str + "さん!");
		mav.addObject("value", str);
		mav.setViewName("form1");
		return mav;
	}
}

HTMLを用意する。
テキストではindex.htmlを修正して再利用しているが、ここでは新たにform1.htmlを作成する。

<!DOCTYPE html>
<html xmlns:th="http://www.thymeleaf.org">
<head>
<meta charset="UTF-8">
<title>top page</title>
<style type="text/css">
	h1 {
		font-size: 18pt;
		font-weight: bold;
		color: gray;
	}
	body {
		font-size: 13pt;
		color: gray;
		margin: 5px 25px;
	}
</style>
</head>
<body>

<h1>form1</h1>

<p th:text="${msg}">please wait...</p>
<form method="post" action="/form1" >
	<input type="text" name="text1" th:value="${value}" />
	<input type="submit" value="Click" />
</form>

</body>
</html>

診断メーカーっぽくしてみよう!

HTMLに入力フィールドを追加する。

<!DOCTYPE html>
<html xmlns:th="http://www.thymeleaf.org">
<head>
<meta charset="UTF-8">
<title>top page</title>
<style type="text/css">
	h1 {
		font-size: 18pt;
		font-weight: bold;
		color: gray;
	}
	body {
		font-size: 13pt;
		color: gray;
		margin: 5px 25px;
	}
</style>
</head>
<body>

<h1>form1</h1>

<p th:text="${msg}">please wait...</p>
<p th:text="${result}">please wait...</p>
<form method="post" action="/form1" >
	<input type="text" name="text1" th:value="${value}" /><br />
	<input type="text" name="text2" th:value="${text2}" /><br />
	<input type="submit" value="Click" />
</form>

</body>
</html>

受け取ったテキストで診断して結果を0~100%の範囲で返す。

	@RequestMapping(value="/form1", method=RequestMethod.POST)
	public ModelAndView send(@RequestParam("text1")String str,
			@RequestParam("text2")String str2,
			ModelAndView mav) {
		int p = (str + str2).hashCode() % 101;
		p = Math.abs(p);
		mav.addObject("msg", "こんにちは" + str + "さん!");
		mav.addObject("result", str + "さんの"
							+ str2 + "度は、" + p +"%です。");
		mav.addObject("value", str);
		mav.addObject("text2", str2);
		mav.setViewName("form1");
		return mav;
	}

診断の結果を表示できるようになった。

そのほかのフォームコントロール

コントローラが長くなってきたので、新しくコントローラを作成する。

FormController

package jp.abc;

import org.springframework.stereotype.Controller;
import org.springframework.web.bind.annotation.RequestMapping;
import org.springframework.web.bind.annotation.RequestMethod;
import org.springframework.web.bind.annotation.RequestParam;
import org.springframework.web.servlet.ModelAndView;

@Controller
public class FormController {
	@RequestMapping(value="/form2", method=RequestMethod.GET)
	public ModelAndView form2(ModelAndView mav) {
		mav.setViewName("form2");
		return mav;
	}

	@RequestMapping(value="form2", method=RequestMethod.POST)
	public ModelAndView send(
			@RequestParam(value="check1", required=false)boolean check1,
			@RequestParam(value="radio1", required=false)String radio1,
			@RequestParam(value="select1", required=false)String select1,
			@RequestParam(value="select2", required=false)String[] select2,
			ModelAndView mav) {
		String res = "";
		try {
			res= "check1:" + check1 +
					" radio: " + radio1 +
					" select: " + select1 +
					"\nselect2:";
		} catch (NullPointerException e) {}
		try {
			res += select2[0];
			for (int i = 1; i < select2.length; i++) {
				res += ", " + select2[i];
			}
		} catch (NullPointerException e) {
			res += "null";
		}
		mav.addObject("msg", res);
		mav.setViewName("form2");
		return mav;
	}

}

form2.html を新規作成する。

<!DOCTYPE html>
<html xmlns:th="http://www.thymeleaf.org">
<head>
<meta charset="UTF-8">
<title>top page</title>
<style type="text/css">
	h1 {
		font-size: 18pt;
		font-weight: bold;
		color: gray;
	}
	body {
		font-size: 13pt;
		color: gray;
		margin: 5px 25px;
	}
	pre {
		font-size: 13pt;
		color: gray;
		padding: 5px 10px;
		border: 1px solid gray;
	}
</style>
</head>
<body>

<h1>form2</h1>

<pre th:text="${msg}">please wait...</pre>
<form method="post" action="/form2" >
	<div>
	<input type="checkbox" id="check1" name="check1" />
	<label for="check1">チェック</label>
	</div>
	<div>
	<input type="radio" id="radioA" name="radio1" value="male" />
	<label for="radioA">男性</label>
	</div>
	<div>
	<input type="radio" id="radioB" name="radio1" value="female" />
	<label for="radioB">女性</label>
	</div>
	<select id="select1" name="select1" size="4">
		<option value="Windows">Windows</option>
		<option value="Mac">Mac</option>
		<option value="Linux">Linux</option>
	</select>
	<select id="select2" name="select2" size="4" multiple="multiple">
		<option value="Android">Android</option>
		<option value="iPhone">iPhone</option>
		<option value="winfone">Windows Phone</option>
	</select>
	<input type="submit" value="Click" />
</form>

</body>
</html>